
Adjusting Metadata for Tracks In Categories
Section 3.3: Adjusting Metadata for Tracks in Categories
Once your tracks are added to their respective categories in NextKast, you can refine their metadata to enhance scheduling, automation, and playback. Adjusting metadata ensures that your tracks are played correctly and at the right time, following your station’s programming strategy.
Metadata Editing Options
NextKast provides several tools to adjust metadata for each track:
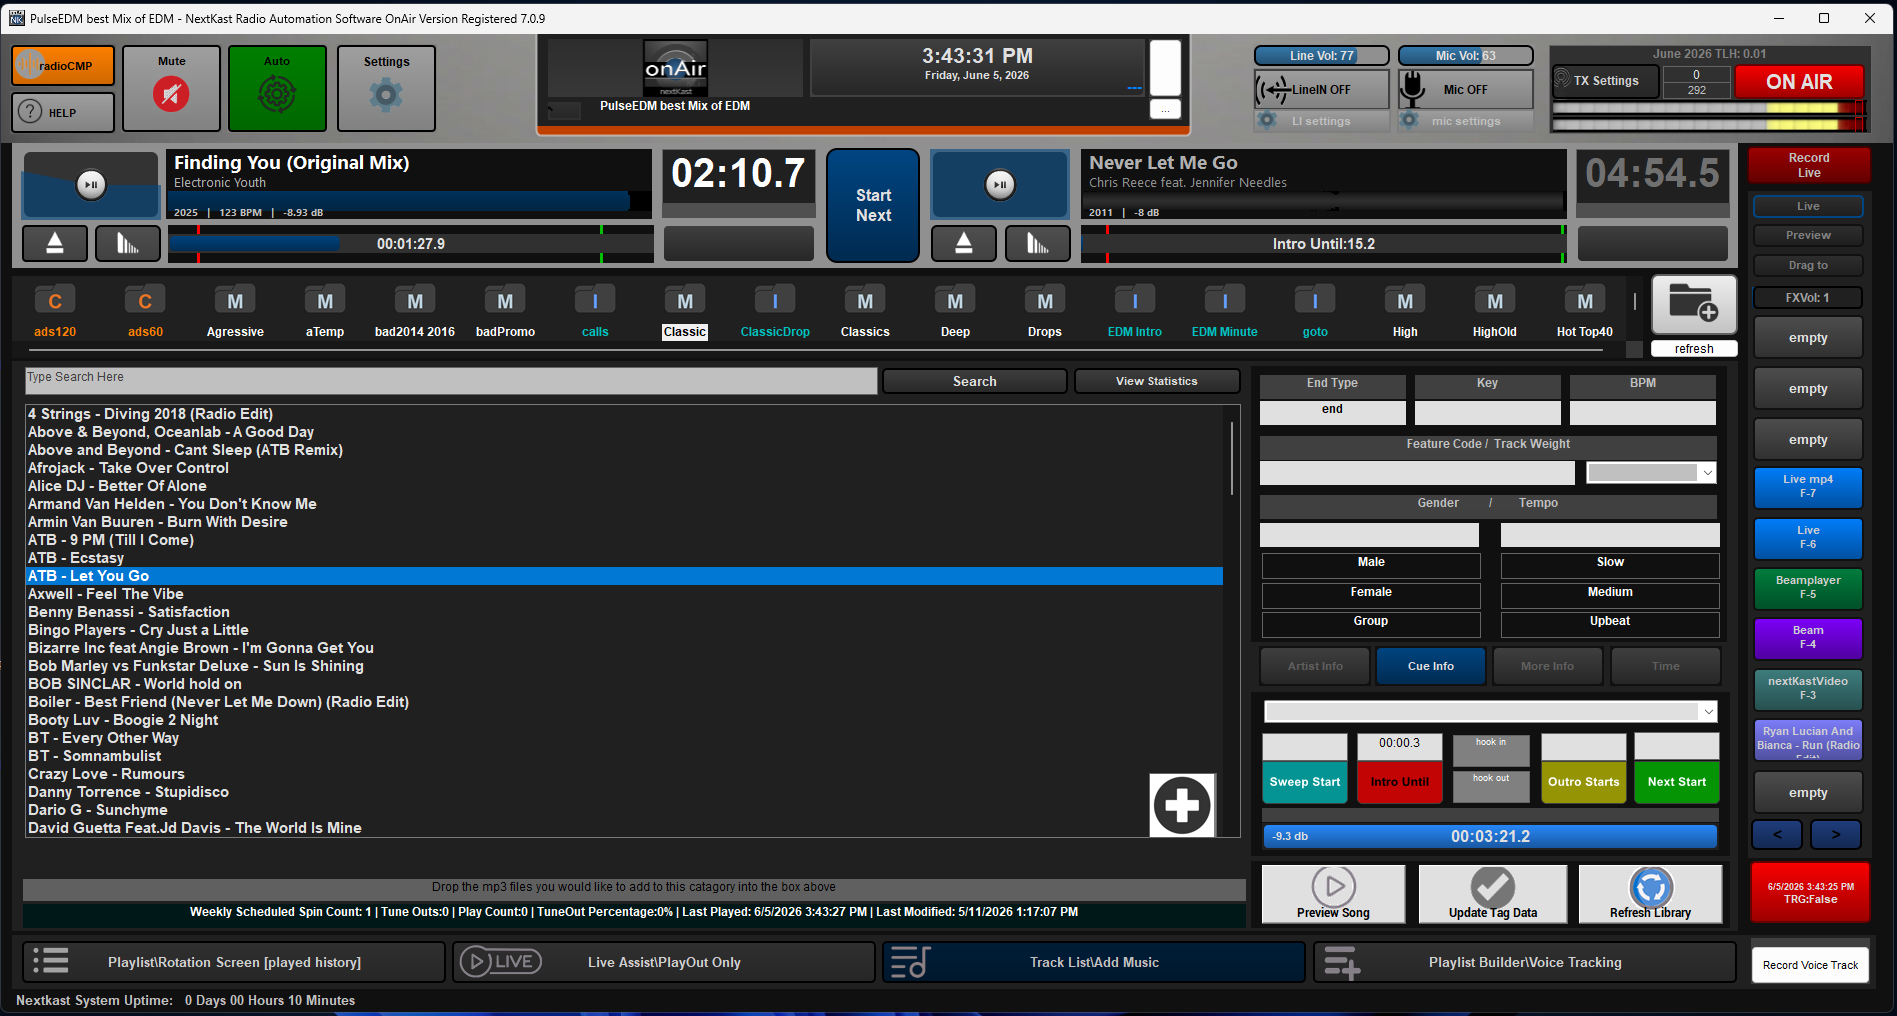
- Editing Basic Metadata:
- Use the four buttons located below the tracklist to add or modify additional artist information, cue points, and comments.
- You can also use the time restriction button to prevent a song from playing during certain hours or days.
- Advanced Cue and Timing Adjustments:
- The next set of buttons allows you to set specific markers for:
- Sweep In: Determines the point when a sweeper will play.
- Intro Time to Post: Marks the intro duration until the main body of the song starts.
- Outro Begin Time (Fade): Indicates when the outro of the song begins.
- Start Point of Next Item: Sets when the next track should begin if in automation mode.
- These settings can be left blank unless specific customization is required, as default settings in the program usually handle most situations effectively.
- The next set of buttons allows you to set specific markers for:
- Bottom Three Essential Buttons:
- Preview Song: Plays the selected song in the preview player (separate from the virtual CD players).
- Update Tag Info: Applies any metadata changes made using the above buttons.
- Refresh Library: Updates the current state of the audio files in all categories. Use this often to ensure your library is up-to-date.
URL Embedding
NextKast supports embedding URLs into MP3 files, allowing you to play remote MP3 files or streams:
- Use the URL button for each track to specify a remote MP3 or stream URL.
- For MP3s, the nextstart marker of the original file will affect the remote MP3 similarly. For streams, the length and nextstart marker of the original MP3 will trigger a nextstart.
- The metadata from the original file will be displayed when the stream is playing. This feature is ideal when you need to broadcast a stream for a certain duration before transitioning to the next element.
Marker Setup for Sweepers, Intros, Outros, Hooks, and Next Start
- Sweepers, Intros, Outros, and Next Start:
- Use the “Preview Song” button to set markers:
- Sweep Start: The point when a sweeper will play. If no sweeper is marked, it will play at the start of the track when enabled in rotation.
- Intro Until: Marks the start of the song’s main body.
- Outro Starts: Indicates when the song’s body has ended.
- Next Start: Sets when the next track should begin. If this is not marked and auto-trim is enabled, it will be set automatically.
- To associate a specific sweeper with a song, select it from the list and press “Update MP3 Tag.” Sweepers are added by dragging files into the top center sweeper player.
- Use the “Preview Song” button to set markers:
- Hooks (Teasers):
- Hooks, also known as teasers, are short segments of tracks used to engage listeners and provide a preview of upcoming songs.
- Select a Track for Hook Setup:
- Choose a track that could be used as a teaser, usually from a high-rotation category like ‘Power.’
- Preview the Song and Set Hook Points:
- Use the “Preview Song” button to listen to the track.
- Navigate to the point where you want the hook to begin and click the Hook In button.
- Move to the point where you want the hook to end and click the Hook Out button.
- Preview the Hook:
- Press and hold the Shift key to jump to the designated hook start and end times for quick previews.
- Include Hooks in Your Playlist Rotation:
- In the rotation setup, decide where you want the hook to play.
- Use the Insert Playlist Macro option and select Play Hook for Track Number.
- Enter the track number corresponding to its position in the playlist.
- For example, if you want the hook to play at the fourth position, insert a macro to play the hook for track number 4.
Additional Cue Information
The Cue Info tab displays extra information when the track is loaded into an active player:
- End Type: Shows on the player when a track is loaded.
- Tracks marked ‘nofade’ will not fade out when the next start occurs.
- Tracks marked ‘Cold’ will not crossfade.
Additional Metadata Features
- Gender: Marks the gender of the track to avoid consecutive plays of the same gender (e.g., two female tracks).
- Tempo: Works similarly to gender, marking tracks to prevent consecutive plays (e.g., two slow songs).
- Rating System: Sets a rating (1-5) to prioritize tracks for more frequent play. For instance, a track rated 5 will play 5 times more often than others. Remember to update the MP3 tag after changing the rating.
- More Info Tab: Contains additional details like Composer, Publisher, and Record Label.
- Time Tab: Restricts the playtime of a track to specific days, hours, or a date range.
Larger Cue Editor
In addition to the simple cue editor available on the Tracklist/Add Music screen, NextKast also provides a more advanced cue editor for fine-tuning cue markers:
- Opening the Larger Cue Editor:
- Double-click on the track to open the Cue Editor screen.
- Editing in the Larger Cue Editor:
- The operation is similar to the simple cue editor—press the cue label to set a marker.
- Fine-tune a marker using the up and down arrows that appear when you click on the value text box.
- Assign a static sweeper using the … button next to the Sweep Start label.
- Cue Sheets:
- The Larger Cue Editor allows you to generate and edit cue sheets, which provide a detailed breakdown of the track’s metadata, including start and stop times for each segment.
- Creating a Cue Sheet:
- Press the Cue Sheet button; you will be prompted to import an external .cue file. If you do not have one, select No.
- Double-click in the wave view to position markers.
- Once markers are positioned in the list of times, double-click the row to add artist and title data.
- To move cue points, activate a row in the list of times and then click on the wave to reposition. Repositioning is allowed only within the limits of other time markers already set.
- To delete the cue sheet attached to a track, press the D button.
- Using Cue Sheets:
- Cue sheets can be used for detailed reporting, synchronization with other audio elements, or to meet licensing and copyright requirements.
- Ensure all markers and metadata align correctly with your station’s programming and reporting needs.
- When importing cue sheets make sure they are created to the.cue sheet standard for propper compatibility.
- Cue sheets files should be named the same as the audio file name except with a .cue file extension, and should be located in the same category as originating audio file.
- Editing Tracks with an External Audio Editor:
- The Larger Cue Editor allows you to edit tracks with an external audio editor of your choice.
- Setting Up the External Audio Editor:
- The first time you press the Edit button, NextKast will prompt you to locate the executable file of your preferred third-party audio editor on your system.
- Editing Process:
- Once set up, pressing the Edit button will open the selected third-party audio editor with the current track loaded.
- Make any changes in the third-party editor, then save and close the editor.
- The updated audio will automatically reload in the Larger Cue Editor, reflecting any changes made.
- Saving Changes:
- When closing the Cue Editor window, a dialog will prompt you to save any changes. Confirming will save and update all cue markers, any generated cue sheets, and incorporate the updated audio edits.
By using the advanced features of the Larger Cue Editor, including cue sheets and external editing capabilities, you ensure precise control over track preparation, aligning with your station’s unique programming and quality standards.