Skip to main content
How Can We Help?
Show Rendering / Mixdown
Rendering or Mixdown of a Playlist in NextKast OnAir
To render or mix down a playlist in NextKast, follow these steps, It is best to do this process in nkManager, but either version is capable:
- Open the Playlist Window: Navigate to the Playlist/Rotation screen where your desired playlist is displayed. Ensure all tracks are correctly arranged, with any desired transitions or sweepers set.
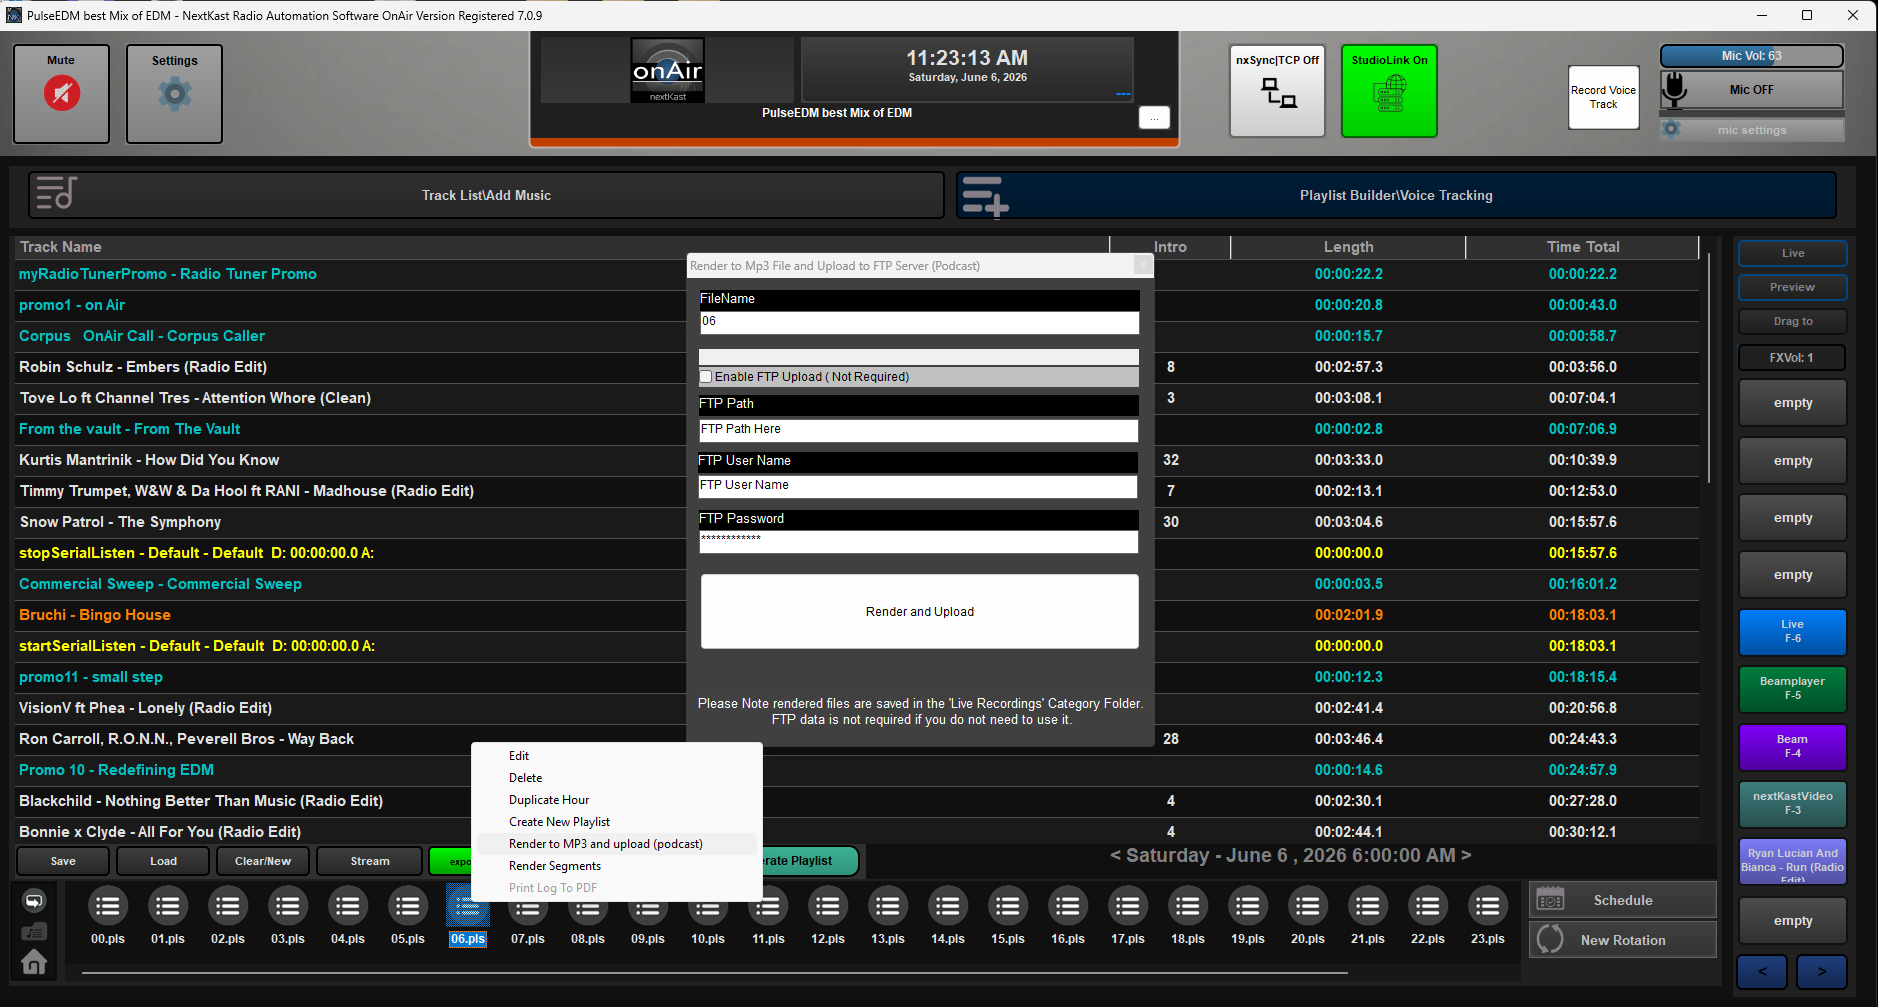
- Select the Mixdown Option: Right click the desired hour and select the Render to MP3 menu item. This option allows you to combine the entire playlist into a single audio file or a sequence of files, depending on your requirements.
- Configure Mixdown Settings: The render to MP3 dialog will appear, here you can name the filename as well as add ftp information if you would like the rendered file to automatically upload to ftp server.
- Start the Mixdown Process: Click “Render and Upload” to begin the mixdown. The process may take a few moments, depending on the playlist length and selected settings. You may hear sped up audio this is normal.
- Monitor Progress: A progress bar will show the status of the mixdown. Once completed the button will indicate where the file was stored, normally in the LiveRecordings folder.
- Check the Output: Once the mixdown is complete, navigate to the specified folder and review the output file to ensure it meets your expectations. You can play back the rendered file to confirm transitions, volume levels, and overall quality.